Template:Chaptertitle DMXC

|
This section is actively undergoing a major edit for a while. To help avoid edit conflicts, please do not edit this section while this message is displayed or contact the editor (Steiny) of this page.
|
This page was last edited
at 21:19, 20 October 2013 (UTC)
3861 days ago.
|
Hint:
20.05.2013: JKuehn: create the article page
20.10.2013: work-in-progress by UPrenner
Overview
The following steps describe an installation of DMXControl 2. This is the standard installation. One finds the current Installer in the download area of the home page of DMXControl[1]
Since DMXControl also supports sound to Light control, the MP3 player Winamp must if this function shall be used be installed on the computer.
 |
If Winamp isn't installed, the two communication files DMXControl.ape and DMXControl.avs are copied into the DMXControl contents directory. If Winamp should be installed, then the two files are copied at the installation into the Winamp Plugin list. If Winamp is installed afterwards, these two files must be copied by Winamp into the Plugin list.
|
Use as of Windows Vista
Since Windows XP, Microsoft has carried out some changes in the system which influence DMXControl's operation.
User accounts control system
With Windows sight Microsoft has introduced the so-called user accounts control system by which all programs practically per default work with restricted rights unless the user particularly agrees to extended rights (administrator rights). Since DMXControl 2 executes actions when starting and ending which need administrator rights, it can get to error messages from DMXC at the start. To nevertheless make possible a starting, there is the PluginAdministrator in the tool folder. Open and all Plugins must this become angehakt once in this. Through this no more error message appears at the start.
Changed folder structure
Since Windows sight the folder structure in comparison with Windows XP is also different. Not but are now the DMXControl projects be stored per default in the DMXControl tool folder any more, under "C:\Users\[Username]\Dokuments\DMXControl-Projekte" to find. To increase the comprehensibility, both the paths for Windows XP and Windows-Versionan for everyone after the following are given to all places in the following manual.
Installation step by step
The following screenshots describe the installation process step by step. The one or other steps can do something depending on operating system and its language of the pointed here differ.
Language

|
|
|
| Picture 1: The language selection
|
|
The installation assistant starts directly with the choice of the installation language. The dialog appears in the language adjusted in the operating system and with a corresponding preselected entry.
|
Welcome

|
|
|
| Picture 2: The welcome dialog
|
|
One is informed on this screen which software one would just like to install. With a click on the badge & laquo; Far & raquo; one reaches the license dialog.
|
License

|
|
|
| Picture 3: The license authentication window
|
|
The end-user license is shown on the license dialog by DMXControl in two languages. Into this you hold tight which this license covers. Among other things also fall under this, what one may do as a user with the software and what isn't permitted. Quite important is that this license agreement by a click on the badge & laquo; Assume & raquo; you accept and one agrees to him. By this consent one accepts the contract and he gets legally definite even if it is a liberal software.
|
Install EasyView?
|
|
|
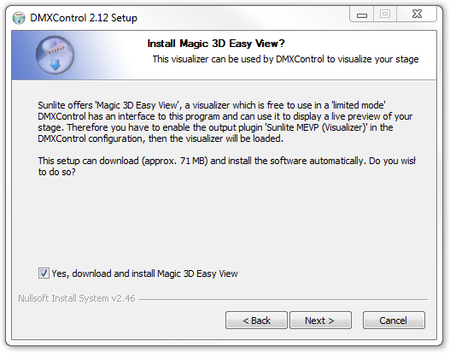
| Picture 4: 3D-Easy View Installationsabfrage
|
|
Hat man den Lizenzvertrag angenommen wird die Frage gestellt, ob der 3D-Visualizer Magic EasyView installiert werden soll oder nicht. Auf dem Heimarbeitsplatz, wo man die Shows vorbereitet und die Bühne simuliert, ist der Visualizer ein sehr nützliches Werkzeug. Auf dem Live-Laptop, der nicht über so viel 3D-Power wie der Dektop zu Hause hat, kann auch getrost auf die 3D-Darstellung verzichtet werden.
|
Destination directory
|
|
|
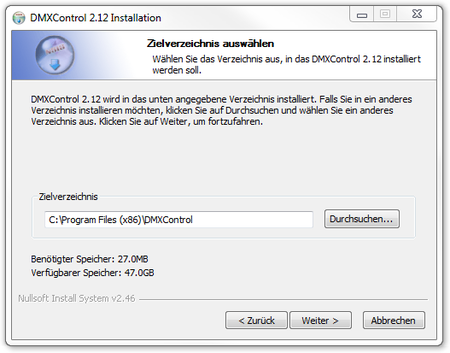
| Picture 5: Auswahl des Speicherortes
|
|
Als nächsten Schritt wählt man das Zielverzeichnis aus, in welches DMXControl 2 installiert werden soll. Der Standardpfad ist da bereits vorgeschlagen und wenn man keine speziellen Bedürfnisse hat, kann man den getrost verwenden. Der Vorschlag variiert hier je nach Betriebsystem, Version und Sprache. Unter einem deutschen 32-Bit Windows (XP, Vista, 7) ist der Vorschlag "C:\Programme\DMXControl" und bei der englischen 32-Bit-Version ist es "C:\Program Files". Hat man hingegen ein 64-Bit Windows sind die Vorschläge "C:\Programme (x86)" bzw. "C:\Program Files (X86)".
|
Program features
|
|
|
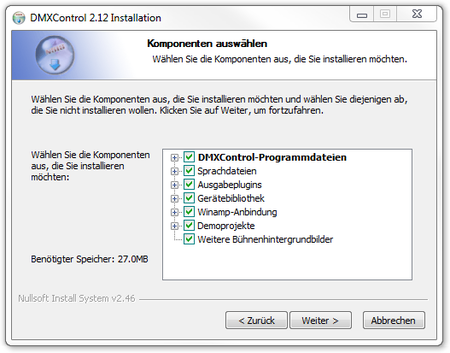
| Picture 6: Auswahl der zu installierenden Komponenten
|
|
Nun geht es an die Detailauswahl der Installation. Bei der Standardinstallation sind alle Features ausgewählt und man kann direkt zum nächsten Schritt übergehen. Möchte man jedoch eine abgespeckte Installation auf einem anderen System vornehmen, kann man hier gewisse Features weg lassen, indem die Markierung entfernt wird. Da DMXControl 2 nicht sehr viel Speicherplatz auf der Festplatte braucht, ist die einfachste Variante die Komplettinstallation.
|
|
|
|
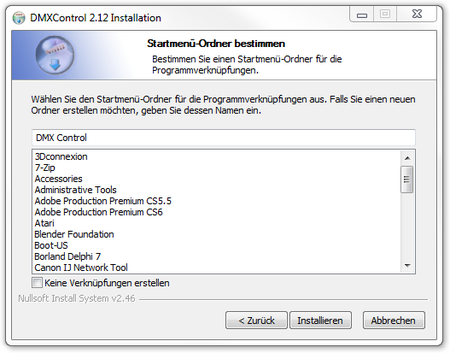
| Picture 7: Eintrag im Startmenü
|
|
Zuletzt wird noch nach dem Namen für den Eintrag im Startmenü gefragt. Der Standardvorschlag ist DMXControl.
|
Installation
|
|
|
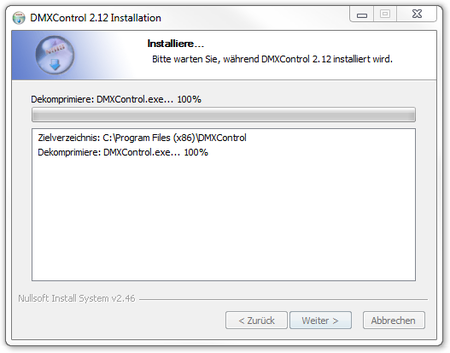
| Picture 8: Installationsfortschritt
|
|
Nun werden die ausgewählten Programmteile von DMXControl 2 dekomprimiert und an die richtige Stelle installiert.
|
Download EasyView (optional)
|
|
|
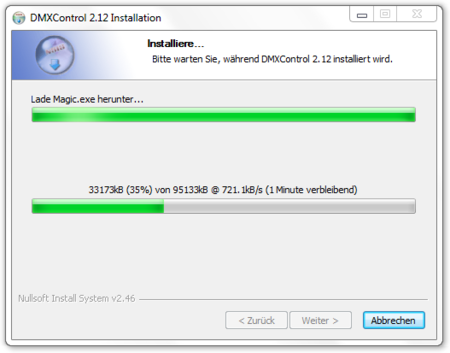
| Picture 9: Download von Easy View
|
|
Hat man die Option zur EasyView-Installation ausgewählt, startet nun der Download des EasyView-Installationsprogramms.
|
Installation EasyView (optional)
|
|
|
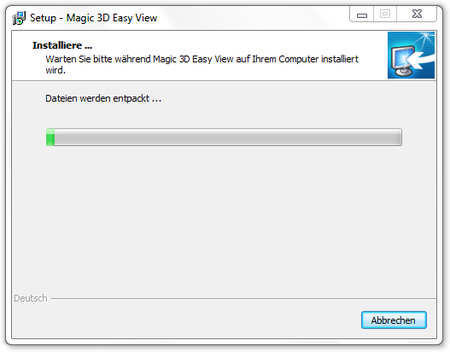
| Picture 10: Installation von Easy View
|
|
Die Installations von EasyView startet vollkommen automatisch und benötigt selbst keine direkten Benutzereingaben.
|
Installation EasyView driver (optional)
|
|
|
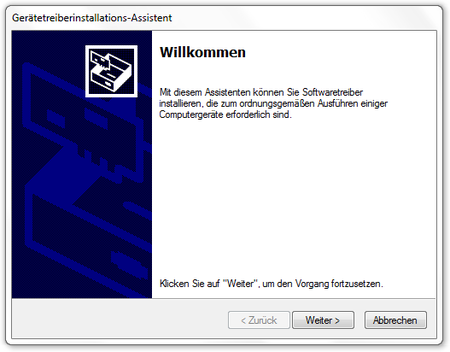
| Picture 11: Treiberinstallation für Easy View
|
|
Während der Installation von EasyView werden Treiber ins System installiert. Zu diesem Zeitpunkt erscheint der von Windows selbst zur Verfügung gestellte Installationsdialog für Gerätetreiber. Dieser kann einfach über den Button « Weiter » gestartet werden.
|
Installation all EasyView drivers (optional)

|
|
|
| Picture 12: Abschluss der Easy View Installation
|
|
Sind die Treiber erfolgreich installiert, kann dieser Teil beendet werden und man kehrt zum Installationsassistenten von EasyView und anschließend zur DMXControl 2 Installation zurück.
|
Installation progress

|
|
|
| Picture 13: Abschluss der Installation
|
|
Am Schluss der Installation hat man die Möglichkeit, den Verlauf der Installation zu betrachten. Dabei sieht man auch, wohin EasyView installiert wurde. Dieser Pfad ist wichtig, wenn man zusätzliche Fixtures in EasyView integrieren möchte. Daher sollte man sich den Pfad ggf. notieren.
|
Start DMXControl
|
|
|
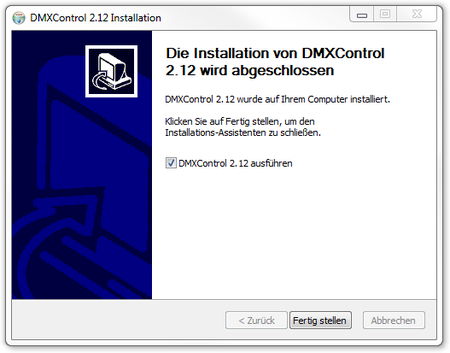
| Picture 14: Installationsabschluss
|
|
Der Installationsabschluss gibt einem die Möglichkeit, DMXControl direkt nach der Installation starten zu lassen, oder aber auch, ohne DMXControl 2 zu starten, zurück zu Windows zu gelangen.
|
Links und Referenzen
Links


