Template:Chaptertitle DMXC

|
This section is actively undergoing a major edit for a while. To help avoid edit conflicts, please do not edit this section while this message is displayed or contact the editor (Steiny) of this page.
|
This page was last edited
at 12:09, 22 October 2013 (UTC)
3859 days ago.
|
Hint:
20.05.2013: JKuehn: create the article page
20.10.2013: work-in-progress by UPrenner
Overview
The following steps describe an installation of DMXControl 2. This is the standard installation. One finds the current Installer in the download area of the home page of DMXControl[1]
Since DMXControl also supports sound to Light control, the MP3 player Winamp must if this function shall be used be installed on the computer.
 |
If Winamp isn't installed, the two communication files DMXControl.ape and DMXControl.avs are copied into the DMXControl contents directory. If Winamp should be installed, then the two files are copied at the installation into the Winamp Plugin list. If Winamp is installed afterwards, these two files must be copied by Winamp into the Plugin list.
|
Use as of Windows Vista
Since Windows XP, Microsoft has carried out some changes in the system which influence DMXControl's operation.
User accounts control system
With Windows sight Microsoft has introduced the so-called user accounts control system by which all programs practically per default work with restricted rights unless the user particularly agrees to extended rights (administrator rights). Since DMXControl 2 executes actions when starting and ending which need administrator rights, it can get to error messages from DMXC at the start. To nevertheless make possible a starting, there is the PluginAdministrator in the tool folder. Open and all Plugins must this become angehakt once in this. Through this no more error message appears at the start.
Changed folder structure
Since Windows sight the folder structure in comparison with Windows XP is also different. Not but are now the DMXControl projects be stored per default in the DMXControl tool folder any more, under "C:\Users\[Username]\Dokuments\DMXControl-Projekte" to find. To increase the comprehensibility, both the paths for Windows XP and Windows-Versionan for everyone after the following are given to all places in the following manual.
Installation step by step
The following screenshots describe the installation process step by step. The one or other steps can do something depending on operating system and its language of the pointed here differ.
Language

|
|
|
| Picture 1: The language selection
|
|
The installation assistant starts directly with the choice of the installation language. The dialog appears in the language adjusted in the operating system and with a corresponding preselected entry.
|
Welcome

|
|
|
| Picture 2: The welcome dialog
|
|
One is informed on this screen which software one would just like to install. With a click on the badge & laquo; Far & raquo; one reaches the license dialog.
|
License

|
|
|
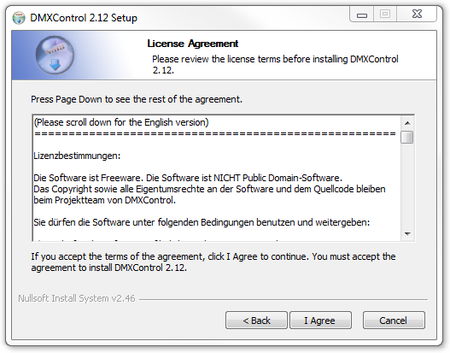
| Picture 3: The license authentication window
|
|
The end-user license is shown on the license dialog by DMXControl in two languages. Into this you hold tight which this license covers. Among other things also fall under this, what one may do as a user with the software and what isn't permitted. Quite important is that this license agreement by a click on the badge & laquo; Assume & raquo; you accept and one agrees to him. By this consent one accepts the contract and he gets legally definite even if it is a liberal software.
|
Install EasyView?
|
|
|
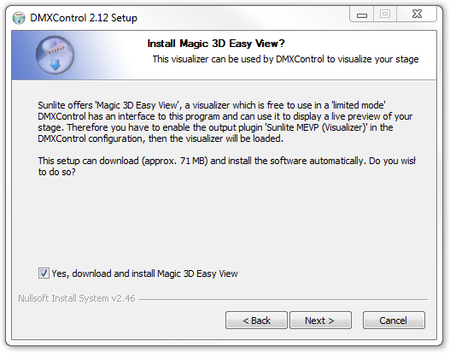
| Picture 4: 3D-Easy View Installation request
|
|
One has the license agreement the question is accepted asked whether the 3D-Visualizer Magic EasyView shall be installed or not. The Visualizer is a very useful tool on the home job where one prepares the shows and feigns the stage. About as much 3D energy as this one the Dektop at home has, can't be renounced the 3D representation also safely on the live laptop computer.
|
Destination directory
|
|
|
| Picture 5: Choice storage location
|
|
As the next step one selects the target directory, shall be installed into which DMXControl 2. The default path is already suggested there and, if one doesn't have any special needs, one can use this one safely. The suggestion varies here depending on Betriebsystem, version and speech. Under a German 32 bit Windows (XP, sight, 7) it is the suggestion "C:\Programme\DMXControl" and at the English 32 bit version is "C:\Program Files". At a 64 bit Windows the suggestions are, however "C:\Programme (x86)" or "C:\Program Files (X86)".
|
Program features
|
|
|
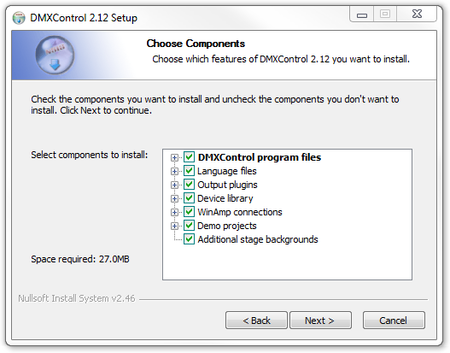
| Picture 6: Choice of the components to be installed
|
|
It works to the detail choice of the installation now. At the standard installation all feature programs are select and one can go over directly to the next step. If one liked to carry out an installation slimmed down, however, on another system, one can leave certain feature programs here away by the marking being removed. Since DMXControl 2 doesn't need much storage on the hard disk, the simplest variant is the complete installation.
|
|
|
|
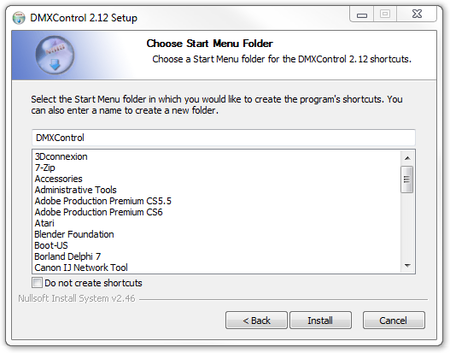
| Picture 7: Entry in the start menu.
|
|
Last, you still ask for the name for the entry in the start menu. The standard suggestion is DMXControl.
|
Installation

|
|
|
| Picture 8: Install progress
|
|
The select program parts are decompressed of DMXControl 2 and installed to the right place now.
|
Download EasyView (optional)
|
|
|
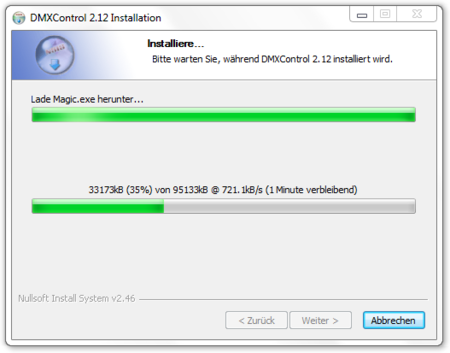
| Picture 9: Download of Easy View
|
|
If the option for the EasyView installation was selected, the download of the EasyView installation program starts now.
|
Installation EasyView (optional)
|
|
|
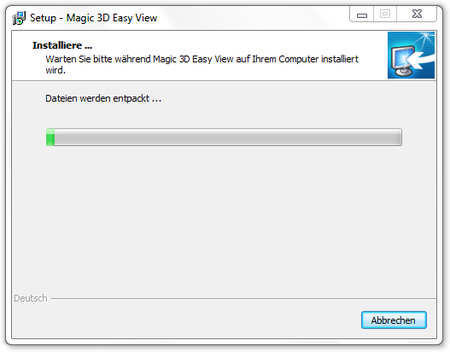
| Picture 10: Installation of Easy View
|
|
The installation of EasyView starts completely automatically and doesn't need direct user inputs itself.
|
Installation EasyView driver (optional)
|
|
During the installation of EasyView drivers are installed into the system. The installation dialog provided by Windows turns up for device drivers for this time. This can started simply over the button « Next ».
|
Install all EasyView drivers (optional)
|
|
If the drivers are installed successfully, this part can be completed and one returns to the installation assistant of EasyView and then to the DMXControl 2 installation.
|
Installation progress
|
|
One has the possibility of looking at the course of the installation at the end of the installation. One also sees where EasyView was installed. This path is important if one liked to integrate additional Fixtures in EasyView. One therefore should himself if necessary note down the path.
|
Start DMXControl
|
|
The conclusion of the installation gives the opportunity, immediately after installation start DMXControl, or but also without starting DMXControl 2, back to Windows.
|
Links und Referenzen
Links


